Monday, 28 February 2011

Clear a Paper Jam on Inkjet Printer

type="html">

Paper jams are among the most common problem with ink jet printers. Follow these instructions to learn how to clear a paper jam so you can get back to work.

Disconnect the power cord from the back of the printer before you begin. With the power disconnected, you will protect yourself from being shocked. This is an important step when you are fixing any type of electronic device.


Instructions

  1. Move your printer so that you'll have access the back panel. Unhinge the back access panel of the printer.
     
  2. Look for paper through the opened back panel. Remove any paper you find jammed.
     
  3. Close the back access panel. Make sure that it latches into place and looks the same way it did before you opened it.
     
  4. Open the front or top access panel. This is the panel you use to access ink cartridges. If the carriage that holds the ink cartridges moves, then you forgot to unplug the printer. Go back and do that now. Look for paper that may be jammed in this area of the printer.
     
  5. Remove any paper you find jammed here. There will be resistance from the paper feeder, so pull slowly or the paper will rip and create a more serious problem.
     
  6. Close the front access panel. Make sure that it latches back into place.


Plug the printer in and attempt to print again. If you can print successfully, you have removed the paper jam.

Tips & Warnings

  1. If you have removed all jammed paper and foreign materials from the printer and you still get an error message, you may have a problem with the carriage or the ink cartridges. Contact HP customer service.
     
  2. Remove jammed paper from the back whenever possible. Removing jams from the front can cause damage.
     
  3. Do not overfill the tray with paper. Check the tray for markings that tell you how much paper it can hold.
     
  4. Do not add or remove paper while the printer is printing. This is one of the leading causes of paper jams.
     
  5. Printers are very sensitive and are easy to damage. Simply touching some inner components can have lasting negative effects. If you are unsure of what you are doing, find someone who is more experienced with printers.

What Is Inkjet Hub Printable?

type="html">


Inkjet hub printable describes a specific type of CD and/or DVD. A printable disc is a disc with a special lining on one side to allow printing on that side of the disc.

Printable
Printable discs offer a unique advantage over standard discs. Recordable CDs and DVDs often require some type of labeling once they've been recorded on. The lining on printable discs allows them to be printed on or written on by hand without damaging the disc.

Hub Printable
The difference between a printable disc and a hub printable disc has to do with the total printable space on the disc. Hub printable discs are lined closer to the center hole than basic discs, allowing almost the entire surface to be printed on.

Inkjet
Inkjet refers to a specific printing process that involves spraying ionized ink droplets in various patterns on a printable surface. An inkjet printable disc is a disc that can be printed on using this technology.

How to Expand My Printer Memory

type="html">


 Most printers have a limited amount of memory; print jobs are spooled from the sending computer in bite-sized chunks the printer can handle.

If you increase the amount of memory in a printer, you also increase the amount of data that the printer can accept from the spooler on your computer. More data through the spooler means faster print times and less time waiting beside the printer.

1). Find the owner's or user's manual for your printer (you may be able to find it online if you do not have it readily available). Refer to the manual for the type of memory you need for your particular printer.

2). Turn off the printer.

3). Locate the memory expansion cover slot for the printer. On most printers, the slot is in the rear of the unit. With some models, however, the slot may be on the side or even the bottom of the printer. In most cases, the slot cover will have a "Memory" or "RAM" label or have a small picture of a memory module on it.

4). Remove the retaining screws for the slot cover with the Phillips screwdriver. Remove the slot cover and place it out of the way.

5). Put on the anti-static wrist strap and attach the clip on the other end to a metal part of the printer case.

6). Remove the printer memory module from its anti-static packaging. Hold the module on the edges. Never touch the metal contact leads on the bottom of the piece of memory.

7). Align the notch in the contact edge of the memory module with the one in the memory slot for the printer. While holding the module at about a 30 to 45 degree angle, push the contact edge of the module firmly into the slot. Once you can push the module no more, push the outer edge of the module up or down (depending on the orientation of the slot) until it snaps into place.

8). Place the slot cover back over the memory expansion slot. Reinsert the retaining screws and tighten them with the screwdriver. Remove the anti-static wrist strap.

9). Attach the printer cable. Plug the electrical cord back into the outlet. Turn on the printer and use as you normally would. You should notice increase in the performance of the printer.

Sunday, 27 February 2011

Barcode Printer.

type="html">


A Barcode printer is a computer device for printing barcode labels or tags that can be attached to objects.


The most common barcode printers employ one of two different printing technologies. They are Direct thermal printers and Thermal transfer printers. Direct thermal printers use a printhead to generate heat that causes a chemical reaction in specially designed paper that turns the paper black. Thermal transfer printers also use heat, but instead of reacting the paper, the heat melts a waxy or resin substance on a ribbon that runs over the label or tag material.

Direct Thermal Printers.


A low- to medium-resolution printer that uses a type of coated paper that darkens when heat is applied to it. The paper is passed by a line of heating elements that burn dots onto the paper. This is typically used in bar code printers and other small specialty printers. It was widely used in early fax machines.


Thermal Transfer Printers.


A thermal transfer printer is a printer which prints on paper (or some other material) by melting a coating of ribbon so that it stays glued to the material on which the print is applied. It contrasts with direct thermal printing where no ribbon is present in the process.

Barcode readers are just an other computer hardware, that can connect with a computer, via USB, PC Slots or any medium.

Troubleshoot a Computer Scanner

type="html">

Computer scanners are used to scan images, including documents and photos. Simple computer scanners are flat bed---they just have a sheet of glass on which you can place the document or photograph to be scanned. 
 
More elaborate scanners have flat beds and automatic document feeders (ADFs) that are good for scanning a stack of documents at one time. Problems with the scanners are related to poor images or to ADF failures including jams. Troubleshooting scanners can be accomplished by following some steps.

Instructions
  1. Remove any shipping materials if you can't achieve a good scan result. Many scanners ship with a protective sheet over the glass. Remove it and any tape from the ADF.
     
  2. Clear any document jams in the ADF by pulling paper out in the direction it was originally traveling. Fan the paper, verify that it is undamaged, dry and try the scan again.
     
  3. Clean the glass with some isopropyl alcohol if you experience poor scanning results. Dirty glass is often the cause of image quality issues.
     
  4. Try a scan and check the results on a computer screen rather than by printing the scan. Printing the scan introduces another element---the printer---that may be causing the quality problem. If the scan looks good on screen but poor printed, the problem is with the printer, not the scanner.
     
  5. Calibrate the scanner if you continue to experience bad scans, in particular all black scans or all blank scans. Place a blank piece of paper on the glass. From the Windows Control Panel access the Scanners and Cameras area. Click on "Advanced" and choose "Calibrate" Allow the calibration to take place with the blank paper.

    Place the calibration sheet that came in the scanner box on the glass and calibrate again. Allow the second calibration to take place and try the scan again.

     
  6. Reinstall the software that came with the scanner if you continue to experience problems. Insert the disk that came in the box into the computer's drive bay and follow the onscreen prompts.

Types of Wireless NIC

type="html">


Types of Wireless NIC

Wireless NIC, or network interface cards, can be divided into categories, depending on the type of wireless network to which they are connecting. They can be internal or external by using USB ports.

The different types vary in bandwidth, range and penetration.

Wireless A
Wireless A is the first standard following the original wireless specifications. It uses the 5Ghz frequency range to avoid the overcrowded 2.4Ghz range other standards use. The 5Ghz has a limited range and does not penetrate walls as readily as the 2.4Ghz range. Wireless A is limited to 54Mbps theoretical bandwidth, which translates into 20Mbps in real conditions.

Wireless B
Wireless B was the first wireless standard adopted by the public. Because it uses the 2.4Ghz band it was limited to 11Mbps bandwidth when equipment came out at the beginning of this century. It was widely adopted because it had a lower price than Wireless A and offered a longer range and better wall penetration. Wireless B is not compatible with Wireless A equipment.

Wireless G
Wireless G is an evolution of Wireless B that uses the same type of frequency modulation as wireless A. It allows for the same 54Mbps bandwidth as wireless A, with the range and wall penetration of wireless B. Just like wireless A, the 54Mbps bandwidth is theoretical. The actual bandwidth is about half. Wireless G is compatible with wireless B equipment.

Wireless N
Wireless N is the latest standard. Many manufacturers released "Pre-N" hardware as early as 2007 to allow their customers access to the faster speed. Most "Pre-N" hardware will work only with access points and NIC from the same manufacturer. Wireless N final became available in October 2009, and allows bandwidth up to 300Mbit. Wireless N uses several antennas to transmit the data on different channels.

Saturday, 26 February 2011

FireWire Vs External USB

type="html">


FireWire Vs External USB

USB is the standard method used to connect a computer to any of several peripheral devices, including cameras, flash drives, keyboards, computer mice and printers. FireWire is the name for the Apple Computer version of the IEEE 1394 connection method usually used with audio/visual components.

Advantages of USB
USB has become the standard connector for the vast majority of computer peripherals, meaning those peripherals can be transferred from one computer to another with plug-and-play ease and no compatibility issues. USB video capture devices can convert your old VHS tapes to DVD.

Disadvantages of USB
USB tends to be slower than FireWire; it may run from 33 percent to 70 percent slower reading data, and from 16 percent to 48 percent slower writing data.

Advantages of FireWire
FireWire also offers plug-and-play ease of use, and its reading and writing speed outstrips USB's. Six-pin FireWire also allows peripheral devices to draw power from the computer they're connected to, so that no external power source is needed for them. Most digital video cameras are FireWire compatible.

Disadvantages of FireWire
FireWire does not work well with low bandwidth devices. FireWire ports are not standard on any non-Apple computers. While six-pin FireWire ports allow for great use of peripherals, these ports are not included on all computers.

USB Graphics Adapter.

type="html">

USB Graphics  Adapter allows a standard VGA, DVI, or HDMI monitor to be connected via a standard USB 2.0 connection. Up to six adapters supported per PC. The virtual USB graphics driver extends or mirrors your desktop. Displays are configured using the standard Windows or Mac display control panels.


 Package includes a USB 2.0 cable, DVI->VGA adapter. No power is needed – power is provided by USB (adapter has LED indicator light). No fan – solution is very low power and completely silent.
Analog VGA connections support up to 1920×1200 and digital DVI/VGA connections up to 2048×1152. All standard monitor modes up to that maximum resolution can be set by the device.


Hardware Requirements and Recommendations

CPU: Dual-core or 2GHz processor or better recommended on Windows Vista, Win7, and Mac (Single core ULV or Intel Atom class processors or better are recommended for Windows XP and Linux)

GPU: Used for 2D/3D rendering on Windows Vista and Win7, requiring a single Intel, nVidia, or ATI primary WDDM driver.

Disable Touchpad When Mouse Connectes

type="html">


If you're typing and your thumb accidentally brushes the touch pad, you can have your cursor jump to a random spot on the screen and make your words appear in the middle of a different paragraph. 

One tool that can make this easier is to use an external mouse instead of the touch pad, but when you disconnect the mouse you still need to be able to use the touch pad. Certain computers allow you to do this automatically, or you can perform a few simple steps to do the same thing manually.

Instructions
  1. Download the latest drivers for your touch pad. Your computer manufacturer will have the latest drivers available at its website. Go to the website for your computer manufacturer and click on the "Support" link and then find the "Drivers" or "Downloads" link. Find your system and download the driver for your touch pad. Contact your computer manufacturer for more help.
     
  2. Click on the "Start" button, then on "Control Panel," then on "Mouse" to open the mouse properties. Depending on your version of Windows, the "Mouse" icon may be under the "Hardware and Sound" section. Find the tab for your touch pad; it may be identified by the maker of your computer or the vendor for that individual part. Click on the "Touch pad" tab to access the setting for your device. On some systems, you will launch a separate configuration tool. You can then look for "Device Select" and click on it. See if your system has a check box next to "Disable touch pad/pointing stick when external USB mouse is present." Check the box.
     
  3. If your computer does not have a setting to disable the touch pad, you will need to do it manually. Proceed to the next step.
     
  4. With your USB mouse plugged in, disable your touch pad manually by clicking on "Start," then "Control Panel," then "System" or "System and Security," depending on your version of Windows. Click on "Device Manager," then find the "Mice and other pointing devices" category and click on it. Locate your touch pad and right-click, then select "Disable." To re-enable your touch pad, you can repeat this step and when you right-click on your touch pad, select "Enable."
Tips & Warnings
  • If you use a USB mouse that is powered by batteries, you may be left unable to use your computer if you have disabled the touch pad and your batteries run out..In Step 3, make sure to have your USB mouse plugged in, or you will no longer be able to use your computer.

Friday, 25 February 2011

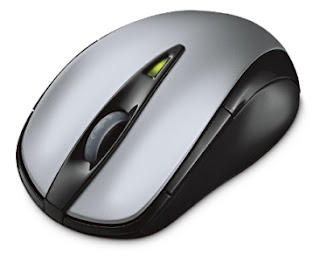
The Different Types of Computer Mice

type="html">


 You can find a computer mouse for just about any use. To figure out what kind of mouse would work best with your PC, you need to know your mouse options.

·        Mechanical mouse
Houses a hard rubber ball that rolls as the mouse is moved. Sensors inside the mouse body detect the movement and translate it into information that the computer interprets.

·        Optical mouse
Uses an LED sensor to detect tabletop movement and then sends off that information to the computer for merry munching.

·        Infrared (IR) or radio frequency cordless mouse:
With both these types, the mouse relays a signal to a base station wired to the computer's mouse port. The cordless mouse requires power, which comes in the form of batteries.

·        A mouse with many buttons:
The extra buttons can be programmed to do specific things, such as navigate the Web or turn pages when you’re reading a document. The typical button-ified mouse has about five buttons.

·        Trackball mouse:
Like an upside-down mouse. Rather than roll the mouse around, you use your thumb or index finger to roll a ball on top of the mouse. The whole contraption stays stationary, so it doesn’t need a lot of room, and its cord never gets tangled.

·        Stylus mouse:
Another mouse mutation enjoyed by the artistic type is the stylus mouse, which looks like a pen and draws on a special pad.

·        Cordless 3-D mouse:
This kind of mouse can be pointed at the computer screen like a TV remote.

Intel IDF 2010: Intel DP67BG Burrage Motherboard Pictures

Intel DP67BG LGA1155 Motherboard Pictures
Intel DP67BG LGA1155 Motherboard

We got a nice little surprise here at the Intel Developer Forum (IDF) 2010 when Intel pulled out their upcoming LGA1155 6-series chipset Sandy Bridge motherboard! This Intel P67 board is called 'Burrage' internally, but you'll know if by the retail part number of DP67BG. The Intel DP67BG is the very first Intel LGA1155 motherboard that we have seen in person and while we don't know the specifics on the board we were able to snap some pictures of the board.
Intel DP67BG LGA1155 Motherboard
Along the bottom edge we can make out three internal USB 2.0 headers in black and a single Firewire 1394a header in blue. If we are counting right it looks like this board will have 14 USB 2.0 and 2 USB 3.0 headers. Six USB 2.0 headers are internal USB 2.0 and eight are external. The pair of Super Speed USB 3.0 headers are external. We can make out three PCIe x1 slots, two PCIe x16 slots and two PCI slots on the board. It looks like NVIDIA SLI and AMD CrossFire multi-GPU setups will be supported on the board if licensing agreements are agreed to between the companies.
Intel DP67BG LGA1155 Motherboard
The Intel DP67BG 'Burrage' motherboard has a very clean look to it and looks like it will be an enthusiast mainboard as it is black, has power and reset buttons and an LED post indicator on the board.
Image Description
Intel has stuck with the skull that lights up on the bottom corner of the motherboard, which is a nice touch.  Intel allows you to turn off and on the lights for the skull in the BIOS, so no worries if that isn't your thing. The DP67BG motherboard has six internal SATA headers and we are guessing the four black ones are SATA II 3.0Gbps and the two blue headers are for SATA III 6.0Gbps devices.
Intel DP67BG LGA1155 Motherboard
Here is a closer look at the LGA1155 socket and the two sets of dual-channel DDR3 memory slots. You can also make out the 24-pin ATX power connector and 8-pin +12V power connector just above the CPU socket. Nothing too special here and you can see the board uses all solid-state capacitors.
Intel DP67BG LGA1155 Motherboard
The rear input/output (IO) panel looks pretty normal, but one thing missing with this Sandy Bridge motherboard is a display connector. It looks like this will be a higher-end motherboard and they won't be offering In this shot you can see that this upcoming Intel LGA1155 motherboard for Sandy Bridge does have two Super Speed USB 3.0 headers, but if you look close you can see the NEC USB 3.0 controller chip just below the first PCI Express x16 slot. This puts to rest all the rumors that Intel will have integrated USB 3.0 support in their chipset.
Intel DP67BG LGA1155 Motherboard
We'll conclude our coverage of the 6-series chipset here since the details are sparse, but we want to leave you with this shot of an Intel Sandy Bridge processor without the integrated heat spreader next to some of the Nehalem and Westmere processors of today.
We will keep an eye open for more Intel H67 and P67 motherboards as the show goes on!